Before fixing the error, first, you must know that the issue is not related to Hardware. If your Hardware is all right, then you can go and check the software.
Leading Causes of Headphones Not Working
Most probably, there might be an issue with your headphones or the port where you plug in the headphones. First, check your headphones by using it in a different device, and if it works, then check out the port.
Leading Causes of Headphones Not WorkingSteps to Fix Headphones Not Working on Windows 10 Issue?Method 1: Update Sound DriversMethod 2: Disable Front Panel Jack DetectionMethod 3: Make Sure You Have Enabled Headphones OptionMethod 4: Change the Format of the HeadphonesMethod 5: Select HD Audio
Now, plug in your headphones to a different port; if it works, then the problem is with the first port, in which you were plugging in your headphones. So, now, let us check out the fixes of the issue headphones not working.
Steps to Fix Headphones Not Working on Windows 10 Issue?
Below are some of the best methods which will help you to solve this error.
Method 1: Update Sound Drivers
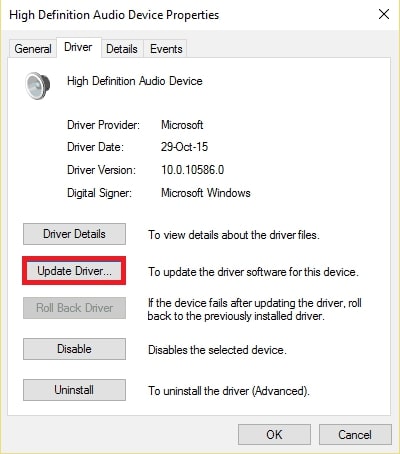
You can update your audio/ sound drivers as sometimes outdated drivers might cause the problem. So, you need to update the drivers by following the steps.
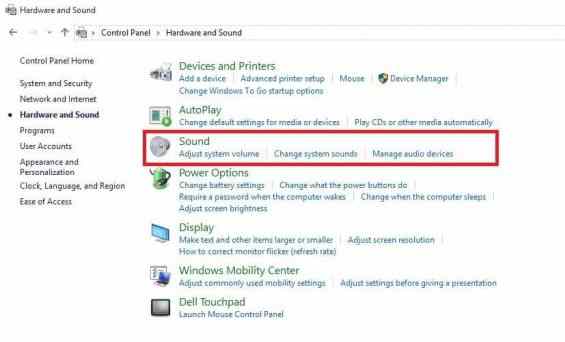
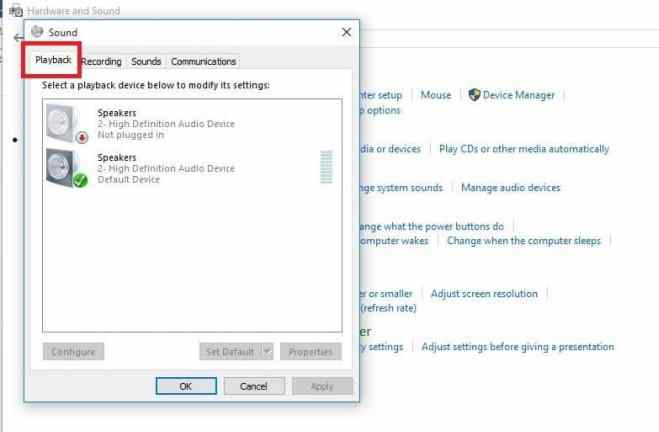
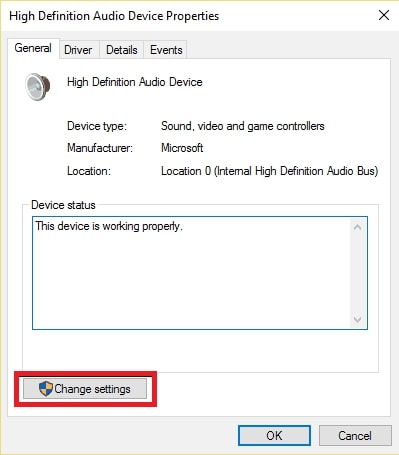
Do right-click on the Start button and click on Control Panel. Now, go to Hardware & Sound. From the given list, click on Sound. Click on the Playback tab on the top left side. Choose your headphones and click on properties. Now, click on change settings and go to the Driver tab. Choose update driver option. Let the update gets downloaded.
Once the downloading process is complete, you can now check out your headphones are working or not.
Method 2: Disable Front Panel Jack Detection
Do right-click on the Start button and click on Control Panel Now, go to Hardware & Sound Search for Realtek HD Audio Manager and click on it Now Go to Connector Settings Disable the front panel jack detection
Now, try your headphones again and see whether it is working or not.
Method 3: Make Sure You Have Enabled Headphones Option
It would be best if you made changes in the Sound Window to drive your headphone work.
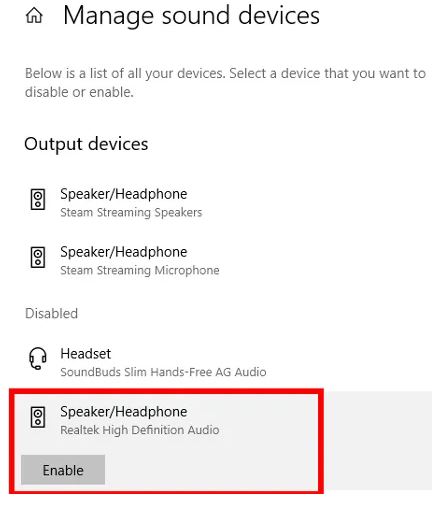
At the corner of Windows, there is a speaker icon. Do right click on the icon. Tap on “Sound Settings” In the Window, click on Manage sound devices. Now, check your headset or headphones are “Disabled” or not. If it is disabled, then enable it by clicking on the “Enable” option.
Method 4: Change the Format of the Headphones
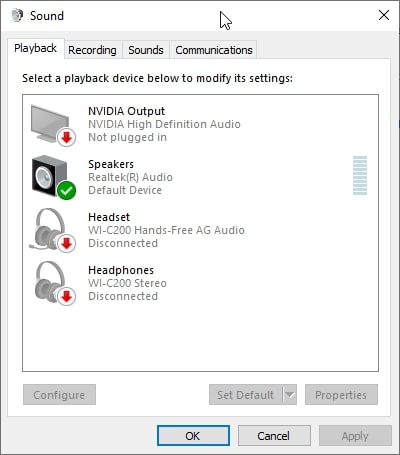
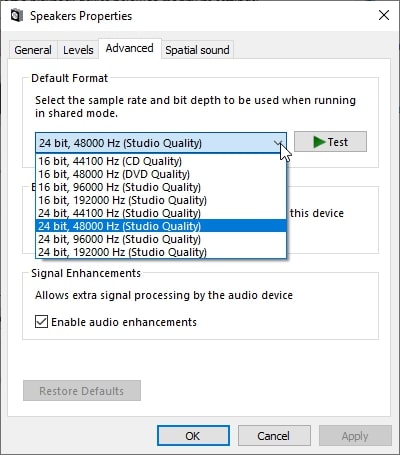
Go to Control Panel and click on Hardware and Sound. Go to Sound window Click on the Playback tab on the top left side. Now, right-click on your headphones ( it will be shown as a “Speakers” or as a “2nd Audio output”) Click on “Properties” Now, click on the Advanced tab. There you will see the Default Format option. Change the default sound format from the dropdown menu. Try to play with the headphones by clicking on “Test.” Change it each time and see if you hear the audio in the headphones or not.
Method 5: Select HD Audio
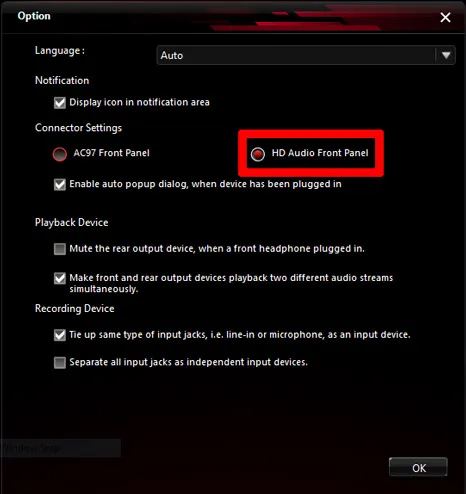
Two audio standards connect to the front jack port. The audio standards are AC97 Front Panel and HD Audio Front Panel. Make sure you select HD Audio front panel in the Connector Settings.
Go to Control Panel Search for Realtek HD Audio Manager Now, go to Settings, which is at the top-right corner Click on “Connector Settings” Under it, you must select the “HD Audio Front Panel” option
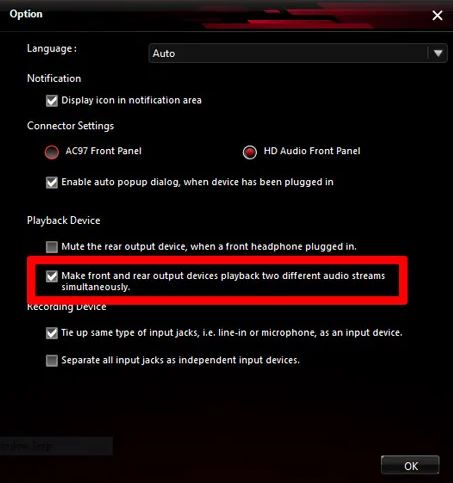
By this, you are using your headphones by replacing your speakers. But if you don’t want to replace your speakers, then use the headphones as a second audio device. In the Connector Settings window, only there is a Playback device option; under that, you must click on the box “Make front and rear output devices playback two different audio streams simultaneously.”
The most common issue to this error is the default sound format, the problem with audio settings, or headphones not working, or the port is not working. We hope these solutions have helped you to fix your headphones, not working issue. If you know any other solution apart from these, then do share it with us.
